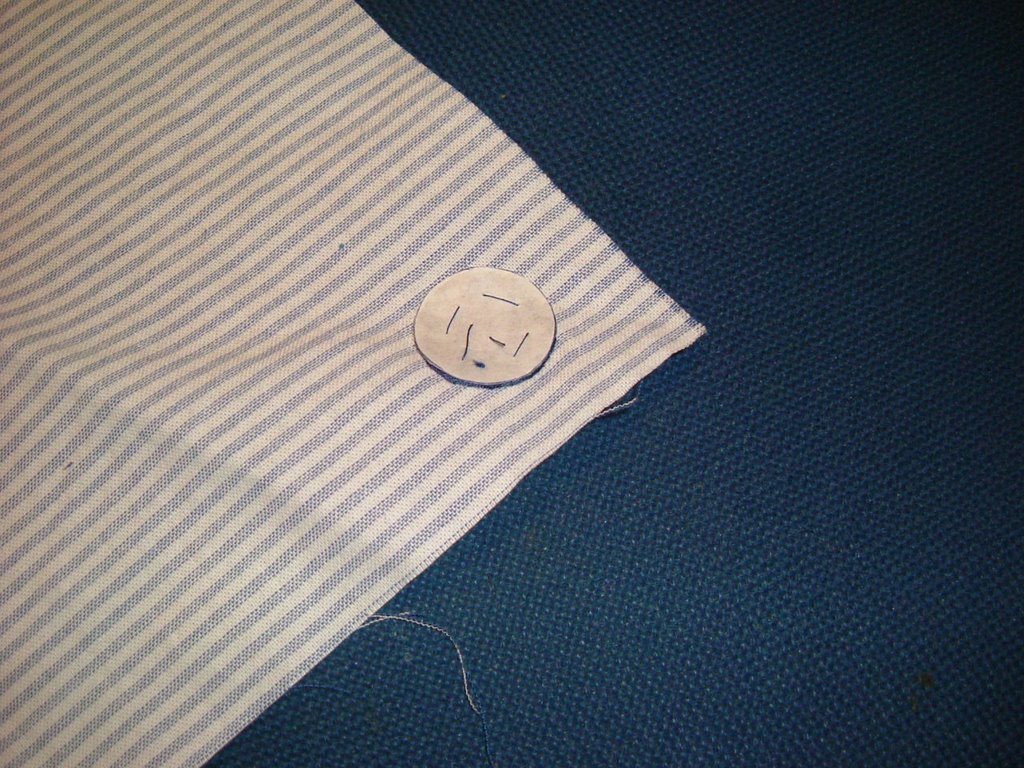
 So once you've finished all that stitching you should be left with something like this - a freezer paper shape tacked onto your background fabric with just a hint of the applique fabric showing at the edges :o)
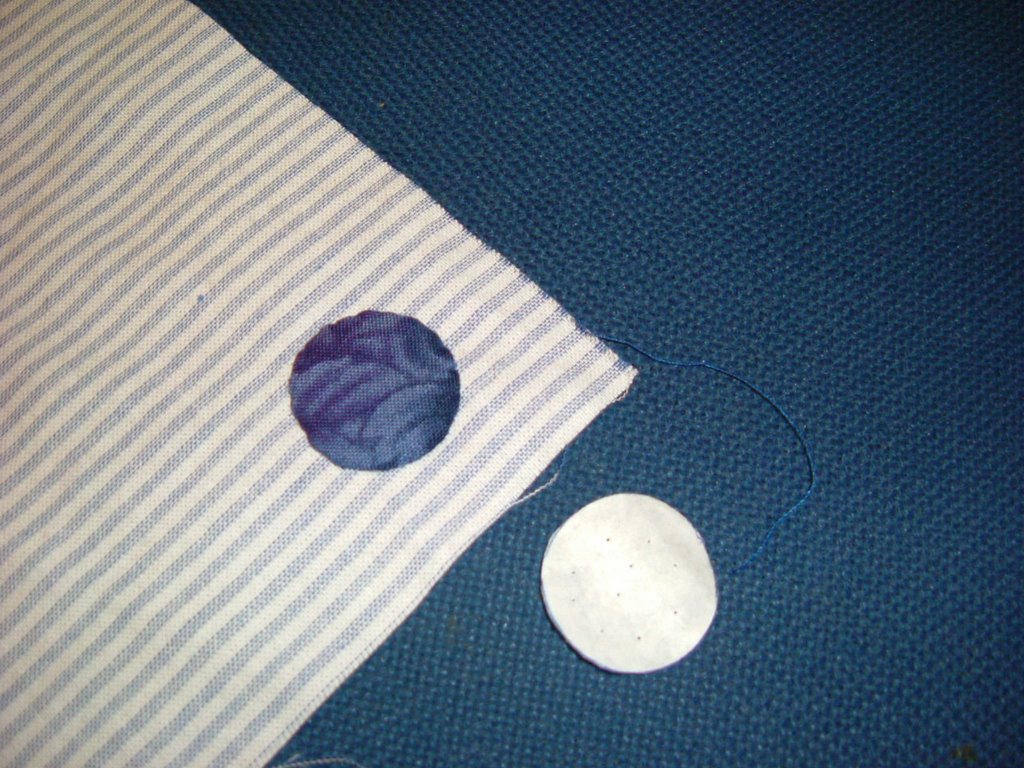
Then take out the tacking stitches, peel off the freezer paper and ............VOILA ! ! ! !
And of course the added bonus is you can reuse the freezer paper shape again and again and again!
So .......what are you waiting for - dig out some freezer paper and have a go :o)
6 comments:
Oh Anne, I've just starting appliqueing and need to read about your process. Looks interesting. I'll have to grab a Diet Coke and read carefully. Do you mind if I come back and ask questions?
Not at all - feel free :o)
That's really interesting, I've never seen it done this way. Beautiful quilt too, such a lot of work on it - you must have 'some' patience ;)!
Thanks so much for the step-by-step pictorial directions!!! Very helpful.
You're just making me feel downright incompetent now ;-) Over 200 of those pennies round the quilt - it would take me half an hour to do one - and then it would probably come out looking like a triangle! I love the finished effect, but I think you must have a lot of patience (and like handsewing) to do it!
Perfect!! and circles are the hardest to keep even and round!! I find it a bit daunting. Do you take the tip of your needle sometimes and sweep it inwards to make a pleat behind the work in the seam allowance? I find I have to do this to get the roundness to stay even.
Thanks again!
Post a Comment